Best Knots for Saltwater Fishing
There’s nothing quite as frustrating as feeling that powerful tug on your line, the adrenaline surging, only to have the hook pull free or your line snap. Most times, we blame the fish, the bait, or even our luck, but often, the culprit is right there at the end of your line: a weak or improperly tied knot. In saltwater fishing, where the fish fight harder and the conditions are tougher, a good knot isn't just helpful, it's absolutely essential. This guide is all about equipping you with the knowledge and the know-how to tie the best knots for saltwater fishing in New Jersey, ensuring your line holds strong when it matters most.
Why Knot Strength Matters in Saltwater Fishing
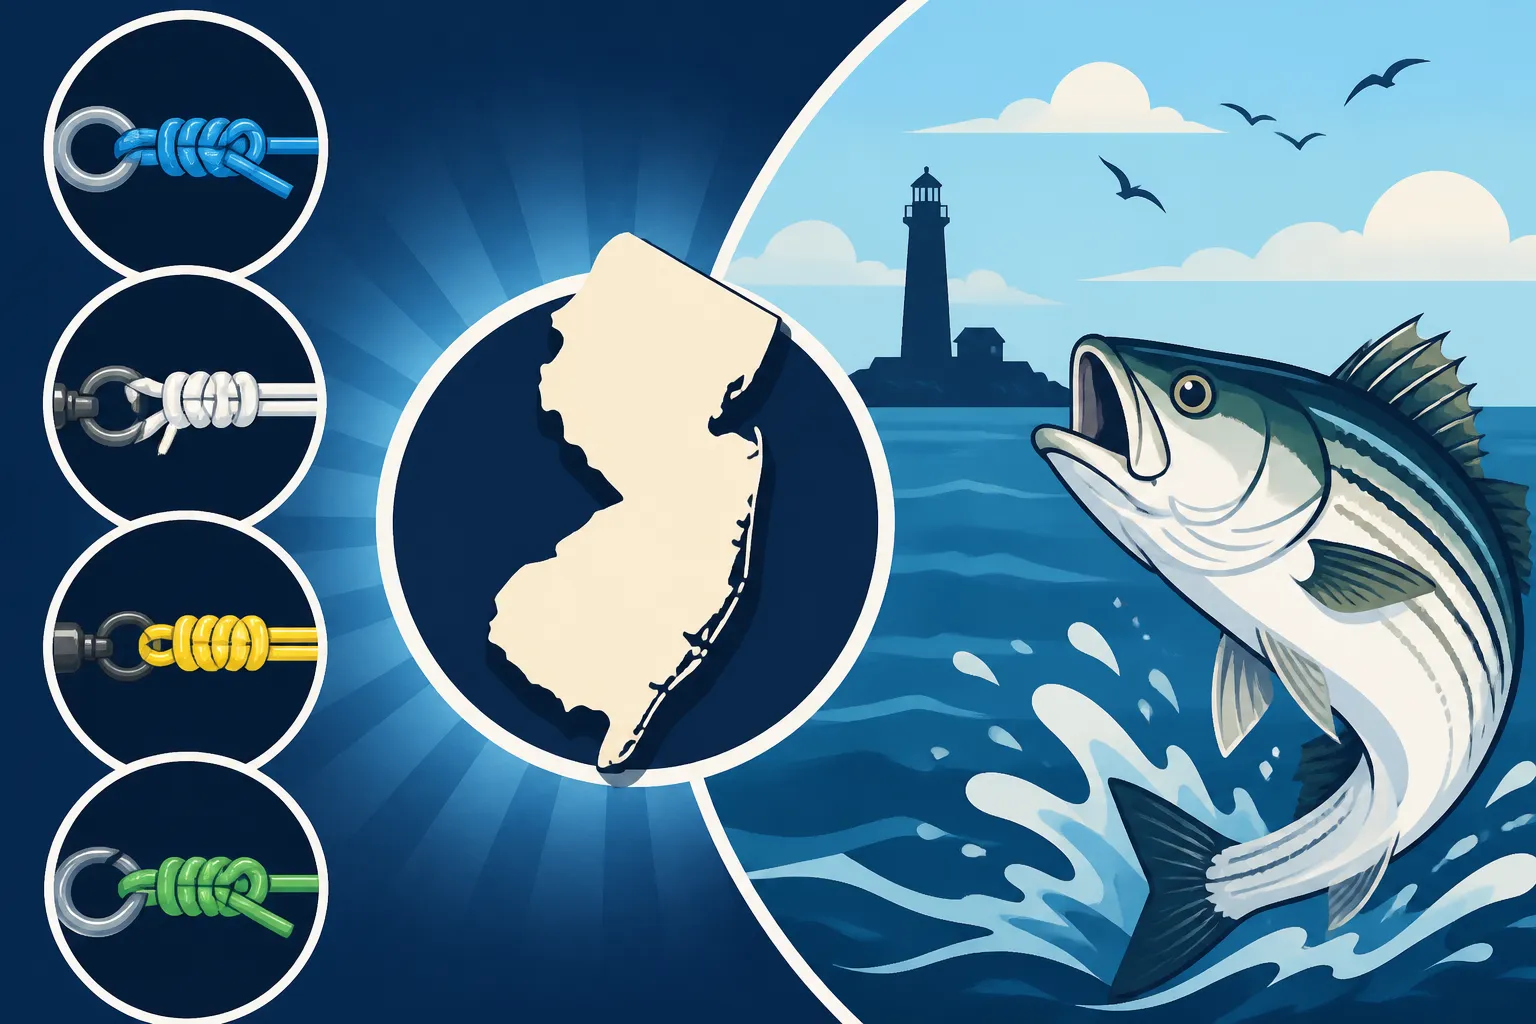
Let's be real, saltwater fishing isn't for the faint of heart, and neither are the fish that call the Jersey Shore home. From the feisty striped bass to the toothy bluefish and the powerful tuna offshore, these species demand everything your tackle can give. Your knot is often the weakest link in your entire setup, and if it fails, all the expensive rods, reels, and lures in the world won't save your catch.
The Brute Force of Saltwater Species
Think about the sheer power of a strong migrating striped bass as it tries to strip line from your reel, or the headshakes of a big fluke buried in the sand. These fish aren't just swimming; they're pulling, twisting, and leveraging their entire body weight against your line. A knot that might hold fine for a panfish in a calm freshwater pond simply won't cut it when you're battling a hard-fighting bluefish in the surf. Their strong jaws, sharp teeth, and explosive runs put immense pressure on every component, especially the tiny connection where your line meets your lure or leader. You need a knot that can withstand sudden shocks and prolonged strain without slipping or breaking.
Harsh Conditions and Abrasion
Saltwater itself is inherently corrosive, and the environment we fish in is far from gentle. The constant friction against boat gunwales, rocky jetties, oyster beds, and even the sandy bottom can quickly wear down your line. When a knot is tied, it creates stress points on the line. If the knot is poorly constructed or uses a technique that crimps or weakens the line, these stress points become even more vulnerable to the harsh elements. A knot needs to be robust enough to resist abrasion from structure and other fish, and also withstand the constant tugging, casting, and reeling that are part and parcel of a day out on the water. Even the sun's UV rays can degrade monofilament line over time, making a strong, well-tied knot even more critical.
Losing Gear and Your Catch
Beyond the disappointment of losing a trophy fish, there's the very real cost of lost tackle. Jigs, lures, sinkers, and hooks aren't cheap, especially when you start getting into the specialized gear for species like black sea bass or tautog around wrecks and reefs. Every time a knot fails, you're not just losing a fish; you're losing a piece of equipment that you've invested your hard-earned money in. It's a double whammy of frustration and expense. Imagine having a big fluke on the line after hours of drifting, only for your knot to come undone and watch your prized bucktail jig disappear with it. It’s enough to make you pack up and go home. Learning to tie a few reliable knots can save you money and, more importantly, save your fishing day from turning into a bust.
Essential Knots for Connecting Line to Terminal Tackle
When we talk about terminal tackle, we're thinking about everything at the business end of your line: hooks, swivels, snaps, and lures. These are the direct points of contact with the fish, so the knots here need to be incredibly strong and reliable.
The Palomar Knot
Oh, the Palomar! If there's one knot I tell every new saltwater angler to learn first, it's this one. It's remarkably simple, incredibly strong, and almost foolproof once you get the hang of it. What makes it so great for saltwater is its nearly 100% knot strength, meaning it retains almost all of your line's breaking strength. It's fantastic for connecting monofilament, fluorocarbon, and especially braided lines to pretty much any terminal tackle with an eye.
Here's how you tie it:
- Double about 6 inches of line and pass it through the eye of the hook or swivel.
- Tie a simple overhand knot with the doubled line, making sure the hook or swivel hangs loose from the bottom of the loop. Don't tighten it yet!
- Pass the loop over the entire hook or swivel.
- Pull both tag end and main line evenly to tighten the knot. Crucially, lubricate the knot with saliva before cinching it down firmly. This prevents friction from burning and weakening the line.
- Trim the tag end close.
The Palomar is a go-to for many Jersey Shore anglers, especially when surf fishing for striped bass with lures or bait, or when jigging for fluke. Its reliability truly gives you peace of mind.
The Improved Clinch Knot
The Improved Clinch is a classic for a reason. It's versatile, relatively easy to learn, and offers good strength, especially with monofilament and fluorocarbon lines. While some argue it's not quite as strong as the Palomar for braided line, it's still a fantastic option for a variety of situations and often quicker to tie in a pinch. It excels when attaching smaller hooks or lures where the Palomar's doubled line might be a tight squeeze through the eye.
To tie an Improved Clinch:
- Pass the line through the eye of the hook or lure.
- Wrap the tag end around the standing line 5-7 times (more wraps for lighter line, fewer for heavier).
- Pass the tag end back through the first loop you created near the eye, and then back through the larger loop that was formed by your wraps. This is the "improved" part.
- Lubricate and slowly pull the main line and tag end to cinch the knot down tight against the eye.
- Trim the tag end.
Many anglers use this knot for freshwater and saltwater alike, and it’s especially useful for trout fishing in New Jersey's streams where lighter lines are often employed.
The Uni Knot
The Uni knot, sometimes called the Grinner knot, is a true workhorse in the fishing world. It's incredibly strong, highly versatile, and can be used for attaching terminal tackle, as well as for line-to-line connections (more on that later!). It's particularly popular with anglers using heavier monofilament or fluorocarbon leaders, or when attaching larger, bulkier lures that might not sit perfectly with other knots. It cinches down very neatly, creating a compact knot that slides through rod guides easily.
How to tie the Uni Knot to a hook:
- Pass the line through the eye of the hook and double back parallel to the standing line.
- Form a loop with the tag end, laying it over the doubled lines.
- Wrap the tag end around both the standing line and its own part within the loop 6-8 times.
- Lubricate the knot and pull the tag end to close the wraps, creating a snug coil around the main line.
- Pull the main line to slide the knot down firmly against the eye of the hook.
- Trim the tag end.
The Uni knot is a favorite among those targeting larger species like tuna or even offshore mahi-mahi where knot integrity under extreme pressure is paramount.
Reliable Knots for Line-to-Line Connections
Sometimes you need to join two pieces of line together – perhaps a heavy fluorocarbon leader to your main braided line, or maybe you just broke off and need to extend your main line. These connections are just as critical, if not more so, than your terminal knots.
The Blood Knot
The Blood Knot is a classic, elegant knot specifically designed for joining two lines of similar diameter, typically monofilament or fluorocarbon. It creates a very strong, slim, and symmetrical connection that can pass through rod guides smoothly. It's a bit more challenging to master than some others, but the reward is a beautiful, strong knot that won't let you down.
Tying the Blood Knot:
- Overlap the two lines you want to join.
- Take one tag end and wrap it around the other line 5-7 times, then bring it back and tuck it between the two main lines where you started.
- Repeat with the other tag end, wrapping it 5-7 times around the first line, then tucking it back through the same opening as the first tag, but in the opposite direction.
- You should now have an "X" shape in the middle with the two tag ends pointing outwards.
- Lubricate the wraps generously and slowly pull on both main lines, allowing the coils to tighten evenly into a neat barrel shape.
- Trim the tag ends very close.
This knot is often used when extending a leader for freshwater species or for making custom rigs.
The FG Knot
Ah, the FG knot. This is the king of braid-to-leader connections, especially for those who fish with braided main lines and fluorocarbon or monofilament leaders in saltwater. It's a friction knot, meaning it "grips" the leader rather than relying on wraps through an eye. The FG knot is incredibly strong, incredibly slim, and passes through rod guides like a dream, which is a huge advantage when casting long distances from the beach or a boat. It can be tricky to learn, but it's worth every minute of practice. You can even find tutorials on Amazon showing how to tie it!
Tying the FG knot involves a series of half-hitches with your braid around the leader, creating a "Chinese finger trap" effect. It's difficult to describe solely in text, but the general steps are:
- Hold the leader taut between your teeth or knees.
- Lay the braided line across the leader.
- Begin making a series of alternating half-hitches with the braid around the leader, pulling each one tight. You'll typically do 20-30 of these.
- Finish with a couple of locking half-hitches, then a final knot (like a Uni or double overhand) on the braid tag end around the leader and standing braid.
- Trim the tag ends extremely close.
This knot is indispensable for anglers chasing fluke, striped bass, or even tuna where braid-to-fluoro leaders are common practice. It truly shines for its strength and minimal profile.
The Double Uni Knot
If the FG knot feels too intimidating (and it can, at first!), the Double Uni Knot is a fantastic alternative for connecting lines, even those with different diameters. It's relatively easy to tie, very strong, and a reliable choice for braid-to-mono or mono-to-mono connections. The only downside is that it creates a slightly bulkier knot than the FG, which can sometimes "click" through rod guides.
To tie a Double Uni:
- Overlap the two lines you want to join.
- With the first line's tag end, form a Uni knot around the second line, completing the wraps (6-8 for braid, 5-7 for mono/fluoro). Don't tighten fully yet.
- Repeat the process with the second line's tag end, forming a Uni knot around the first line.
- Lubricate both knots and slowly pull on the standing lines of both connections simultaneously. The two Uni knots will slide together and cinch against each other, forming a single, secure connection.
- Trim the tag ends.
This knot is a great choice for various situations, from adding a shock leader for surf fishing to extending your main line. Knowing how to tie one is a valuable skill for any angler. You can learn more about how to rig for surf fishing in New Jersey by having a variety of knots in your arsenal.
Specialty Knots for Specific Saltwater Scenarios
Sometimes, the standard knots aren't quite enough for particular fishing situations. Here are a few specialty knots that can make a big difference in specific saltwater setups.
The Dropper Loop
When you're bottom fishing, especially from the surf or a boat, having multiple baits in the water can significantly increase your chances of a bite. The Dropper Loop is perfect for creating snelled hooks or multiple bait presentations on a single leader. It's essentially a loop tied directly into your main line or leader, allowing you to attach a hook on a short snell, keeping it away from the main line and allowing it to swing naturally.
How to tie a Dropper Loop:
- Create a large loop in your line where you want the dropper to be.
- Twist the loop 5-7 times, keeping a small opening in the middle of the twists.
- Push the original loop through the opening you created.
- Lubricate and pull both ends of the main line, allowing the twisted section to cinch down and form a standing loop.
- Pull firmly to set the knot.
You can then attach a hook directly to this loop or tie a snelled hook to it. This is a common setup for catching panfish or even winter flounder in New Jersey's bays.
The Bimini Twist
If you're getting into serious offshore fishing for species like tuna, marlin, or even larger sharks, you'll hear about the Bimini Twist. This knot is used to create a double line section at the end of your main line, essentially doubling its breaking strength. This "double line" acts as a shock absorber, providing incredible strength and stretch for battling huge, powerful fish, especially when using heavy tackle or for leader-to-mainline connections that endure immense strain. It's a complex knot that requires practice, often done with a buddy or using specialized tools.
The Bimini Twist involves creating a long double-line section, typically 6-10 feet, by twisting the line under tension and then securing it with specific half-hitches. It's renowned for its incredible strength retention, often close to 100%, and its ability to absorb powerful shocks without breaking. This knot is essential if you're venturing out on New Jersey deep sea fishing charters.
The Surgeon's Loop
Sometimes you just need a strong, reliable loop at the end of a leader, or a quick way to create a loop for attaching a snelled hook or a dropper. That's where the Surgeon's Loop comes in. It's a simple, fast, and strong knot that's easy to tie, even with cold hands or in low light. It's particularly good for heavier monofilament and fluorocarbon lines.
Tying a Surgeon's Loop:
- Double about 6-8 inches of line to create a loop.
- Treat this doubled section as a single line and tie a simple overhand knot with it. Don't tighten it yet.
- Pass the entire loop through the center of the overhand knot a second time.
- Lubricate and slowly pull all four strands (the two main lines and the two parts of the loop) to cinch the knot down evenly.
- Trim the tag end.
This knot is frequently used for creating a loop at the end of a leader to quickly attach to a swivel or another line. It's a useful, quick knot to have in your repertoire, especially for constructing custom bottom rigs.
Tips for Tying Stronger Saltwater Fishing Knots
Learning the knots is one thing, but tying them well is another. Here are some pro tips to ensure your knots are as strong as they can be.
Practice Makes Perfect
This might sound like a broken record, but it's absolutely true. Don't wait until you're on the water with a fish biting to try a new knot. Practice at home with some spare line. Watch videos (there are tons of great ones on YouTube!), follow diagrams, and tie knots repeatedly until you can do them confidently and consistently, even without looking. The muscle memory you build will pay off immensely when you're in a real-world fishing situation, perhaps with cold hands or diminishing light. Think about it – would you rather fumble with a knot while a school of striped bass is blitzing, or quickly tie a strong connection and get your line back in the water? Consider practicing with a thicker, brightly colored rope first to really see the wraps and how the knot forms. This will translate easily to thinner fishing line.
Lubrication and Cinching
This is a critical step that many beginners (and even some experienced anglers) overlook. When you pull a knot tight, especially with monofilament or fluorocarbon, friction generates heat. This heat can actually weaken the line at the critical points within the knot, reducing its breaking strength significantly. To prevent this, always lubricate your knots before cinching them down. A bit of saliva works perfectly, or a dab of water. Once lubricated, pull the knot slowly and steadily to seat all the wraps tightly and evenly. Avoid sudden, jerky pulls. A smooth, controlled cinch is key to maximizing knot strength.
Trim Tag Ends Properly
After you've tied and cinched your knot, you'll have a small piece of excess line sticking out – the "tag end." It's tempting to trim it as close as possible, but resist the urge to cut it flush to the knot. Leaving a tiny bit of tag end, say 1/8 to 1/4 inch, can actually help prevent the knot from slipping or unraveling under extreme pressure. If you trim it too short, the line could pull through the knot's wraps. For knots that involve multiple wraps, like the FG knot, it's particularly important to ensure those tag ends are secure and trimmed cleanly so they don't snag on rod guides during casting. This also applies to the loop knots like a New Jersey Circle Hook Requirements for Bait Fishing if you're using bait.
Inspect Your Knots Regularly
Even the best-tied knot can weaken over time due to casting, reeling, fighting fish, and abrasion against structure or even debris in the water. Get into the habit of inspecting your knots every hour or so, and definitely after every fish you catch or after getting snagged. Look for any signs of fraying, discoloration, or kinks in the line near the knot. If it looks suspect, cut it off and tie a fresh one. It takes a minute to retie a knot, but it can save you from losing a trophy fish or an expensive lure. This is especially important for New Jersey Fluke Size and Bag Limits Explained and other species where you need every advantage.
Here's a quick reference table for some of the common knots we've discussed:
| Knot Name | Primary Use | Line Types | Strength (out of 5) | Ease of Tying (out of 5) | Notes |
|---|---|---|---|---|---|
| Palomar Knot | Hooks, Swivels, Lures | Braid, Mono, Fluoro | 5 | 4 | Excellent all-around; near 100% strength with braid. |
| Improved Clinch | Hooks, Swivels, Lures (smaller) | Mono, Fluoro | 4 | 3 | Classic; good for lighter lines, though not ideal for braid. |
| Uni Knot | Terminal, Line-to-Line | Braid, Mono, Fluoro (versatile) | 4 | 3 | Strong, neat, good for heavier lines. |
| Blood Knot | Line-to-Line (similar diameter) | Mono, Fluoro | 4 | 2 | Slim, strong, but tricky; best for same-size lines. |
| FG Knot | Braid-to-Leader | Braid (main) to Fluoro/Mono (leader) | 5 | 1 | Incredibly strong, slim; steep learning curve, but worth it. |
| Double Uni Knot | Line-to-Line (different diameters) | Braid, Mono, Fluoro | 4 | 3 | Easier braid-to-leader than FG, but bulkier. |
| Dropper Loop | Multiple Baits/Snells | Mono, Fluoro | 3 | 4 | Creates standing loop for additional hooks. |
| Bimini Twist | Double Line Leader | Mono, Fluoro (heavy) | 5 | 1 | Extreme strength for big game; complex to tie. |
| Surgeon's Loop | Simple Loop/Leader Connection | Mono, Fluoro | 4 | 4 | Quick, strong loop at end of line. |
Mastering just a few of these knots can dramatically improve your success and confidence on the water. For instance, knowing the FG knot means you can confidently fish Striped Bass Fishing in New Jersey with a braid mainline and a virtually invisible fluorocarbon leader. A strong Palomar will hold your lure firm during the New Jersey Fluke Season Dates for 2026. And for something like How to Tie a Fluke Rig, a combination of a Surgeon's Loop for your dropper and an Improved Clinch for your sinker could be just the ticket. Even for New Jersey Trout Fishing Techniques, a well-tied Improved Clinch is indispensable. You can find excellent books and guides on Amazon that provide detailed instructions and diagrams for all these knots, making your practice sessions even more productive. Don't underestimate the power of a good knot; it's truly your direct connection to the fish.
Ultimately, your success in saltwater fishing, especially here in New Jersey where the challenges are as great as the rewards, often comes down to the smallest details. A strong, well-tied knot is arguably the most crucial detail of all. It’s the peace of mind knowing that when that big fish hits, your line will hold, and your efforts won't be undone by a moment of haste or an overlooked technique. Take the time to practice these knots, understand their strengths, and make them a reliable part of your fishing routine. Happy knot tying, and tight lines out there!
Disclaimer
This article is for general informational purposes only and does not constitute professional advice. Laws, prices and regulations vary by location and change over time. Consult a qualified professional for guidance on your specific situation.