How to Tie a Fluke Rig
There’s nothing quite like the excitement of a day out on the water, targeting those delicious New Jersey fluke. But let's be honest, getting your bait to dance just right on the bottom can feel like a secret handshake sometimes. If you've ever found yourself frustrated with tangled lines, missed bites, or simply wondering if there's a better way to present your offering to these finicky flatfish, you're not alone. This guide is here to untangle the mystery and walk you through, step by step, how to tie a fluke rig that truly works in our local waters.
Why a Dedicated Fluke Rig Matters for New Jersey Waters
When you're chasing summer flounder, or "fluke" as we affectionately call them here in New Jersey, understanding their behavior is key to success. They aren't like some other predatory fish that chase down their meals from a distance. Fluke are ambush predators, masters of camouflage, often lying flat against the sandy or muddy bottom, perfectly blended in, just waiting for an unsuspecting baitfish or crustacean to swim by. This unique hunting style means your bait presentation needs to be spot-on, getting your offering right into their strike zone and making it look irresistible.
Understanding Fluke Behavior and Habitat
Fluke are masters of disguise, their flattened bodies and speckled patterns allowing them to disappear against the varied textures of the seafloor. They'll often burrow slightly into the sand or mud, leaving only their eyes exposed, ready to spring into action. This behavior dictates that your bait needs to be presented directly in their line of sight, usually right on or very close to the bottom. If your bait is too high in the water column, it's simply going unnoticed by these bottom-dwelling experts.
Our New Jersey waters offer a diverse range of fluke habitats. You'll find them migrating into shallower bays, estuaries, and even the surf during the warmer months, seeking out sandy flats, grass beds, and the edges of channels. As the seasons change, they'll push offshore to deeper wrecks, reefs, and lumps. A good fluke rig is designed to hug these contours, whether you're drifting across a bay or bouncing along a deeper channel. Understanding this migratory pattern and habitat preference is crucial for knowing where and when to target them, and consequently, what kind of rig will perform best.
The constant battle with current and drift is another major factor in fluke fishing. Whether you're in Barnegat Bay or along the coast, the water is rarely still. Your rig needs to be able to get to the bottom quickly and stay there, all while allowing your bait to move and flutter naturally. A rig that tumbles or spins unnaturally will often be ignored, and one that lifts off the bottom too easily will simply pass over the heads of waiting fluke. It’s a delicate balance of weight, leader length, and bait presentation that a purpose-built fluke rig aims to perfect.
Simply put, a successful fluke presentation is about mimicking natural prey that is either swimming just above the bottom or struggling near it. A carefully constructed rig ensures your bait moves enticingly with the boat's drift or the natural current, triggering that predatory instinct in the fluke. This is why knowing How to Drift Fish for Fluke is so important, as it directly impacts your rig choice and setup.
The Limitations of Generic Bottom Rigs
Many anglers start with a basic high-low rig, which is a great general-purpose bottom fishing setup. However, for fluke, it often falls short. A standard high-low rig can present baits too far off the bottom, or in a way that allows them to tangle easily, especially when drifting. The loops that hold the hooks can also be prone to twisting, creating a presentation that looks anything but natural to a cautious fluke.
The problem with a generic rig is that it might not allow your bait to have the kind of lively, fluttering action that truly entices a fluke. Fluke often hit a bait that looks like it's struggling or swimming erratically. If your rig is too stiff, too heavy, or simply doesn't allow the bait to move with the subtle undulations of the current, you're missing out on potential bites. You might be getting the bait down there, but you’re not necessarily presenting it effectively.
Imagine your bait sitting motionless or getting buried in the sand – that's a common frustration with less optimized rigs. Fluke are notorious for gently mouthing a bait before fully committing, and if your rig isn't sensitive enough or the bait isn't appealing, they'll simply let go. Many times, you might think you're just not getting bites, when in reality, the fluke are there, but your presentation isn't convincing them to take the plunge. That's why a specialized rig designed to keep your bait visible and active, away from the immediate vicinity of your sinker, makes all the difference.
Essential Components of a Fluke Rig
A great fluke rig is more than just a hook and a weight; it's a carefully selected assembly of components, each serving a specific purpose to maximize your chances of success. Understanding what each part does and why it's chosen can really elevate your game, whether you're fishing a quiet back bay or the bustling inlets of the Jersey Shore.
Choosing the Right Line, Leader, and Swivels
Your main fishing line sets the foundation for your entire setup. For fluke, many anglers prefer braided line (braid) for its incredible sensitivity and lack of stretch. This allows you to feel even the most subtle tap from a fluke, which can be crucial when they're just lightly mouthing the bait. Braid also cuts through the water better than monofilament, helping your sinker get to the bottom faster and stay there in current. However, braid is highly visible in the water, which is why a good leader is indispensable.
The leader is the section of line connecting your main line to your hooks and sinker, and it's where much of your fluke rig magic happens. Fluorocarbon is the gold standard for fluke leaders in New Jersey. It's nearly invisible underwater, which is a huge advantage when targeting wary fluke, and it boasts excellent abrasion resistance against sharp teeth, rocky bottoms, and shell beds. For fluke, a leader in the 20 to 30-pound test range is usually perfect, providing strength without sacrificing stealth. The specific length can vary, but typically 3 to 5 feet gives you enough room to work with. Remember to consider New Jersey Fluke Size and Bag Limits Explained when selecting your gear, as larger fish require more robust tackle.
Swivels play a critical role in preventing line twist, especially when drifting baits that might spin or when dealing with strong currents. A quality barrel swivel or ball-bearing swivel will ensure your main line stays untangled, giving you a direct, uninterrupted feel for those fluke bites. Many anglers will use a snap swivel at the bottom of the rig to quickly change sinker weights as current conditions change, which is a common occurrence in our tidal New Jersey waters. When connecting your leader to your main line, ensure you use a strong, reliable knot like the FG knot or a double uni knot, as this connection is often the weakest point in your entire setup.
Hooks and Sinkers – The Heart of the Rig
When it comes to hooks for fluke, there are generally two camps: the traditional J-hook users and those who prefer circle hooks. J-hooks (often 3/0 to 5/0, depending on bait size) are popular for fluke because they offer a good hookup ratio with a quick strike, which many anglers prefer for the aggressive nature of fluke bites. However, if you're not paying close attention, J-hooks can lead to gut-hooked fish, making catch-and-release more difficult. Circle hooks, on the other hand, are excellent for conservation; they typically hook the fish in the corner of the mouth, making for an easier release. They require a slightly different technique – resisting the urge to set the hook hard and instead allowing the fish to swim off with the bait until the line tightens. Which you choose depends on your fishing style and whether you plan on keeping or releasing your catch.
Your sinker is arguably the most crucial component for getting your bait into the strike zone. Without adequate weight, your bait will simply drift too high in the water column, out of sight of the fluke. Common sinker types for fluke include bank sinkers, pyramid sinkers, and flat or disc sinkers. Bank sinkers are versatile, while pyramid sinkers dig into the sand better in strong currents, helping to hold bottom. Flat or disc sinkers are fantastic for drifting, as their shape helps them glide over the bottom, reducing snags. The weight of your sinker needs to be constantly adjusted based on the current and depth. You want just enough weight to maintain contact with the bottom without dragging excessively, allowing your rig to bounce and flutter naturally.
A true game-changer for fluke fishing is the addition of a teaser. A teaser is essentially a second, smaller hook tied above your main bait hook, often dressed with a small bucktail, a colorful grub, or a scented soft plastic. This dual-hook setup creates extra attraction and doubles your chances, as fluke will often strike at the teaser, thinking it's a smaller baitfish or struggling prey. The contrast between the teaser and your main bait can be incredibly effective, and you can find a huge variety of pre-rigged teasers and raw materials on Amazon to experiment with. Many anglers swear by pairing a Gulp! Grub on the teaser with a strip of squid or live bait on the main hook.
Beads, Floats, and Other Attractors
Small beads, often brightly colored, are not just for aesthetics; they serve several practical purposes on a fluke rig. Firstly, they act as a buffer, protecting your knots from the abrasion of swivels or sinkers that might slide. Secondly, they add a touch of color and visual appeal to your rig, which can sometimes be enough to pique a curious fluke's interest, especially in murky water. Lastly, some anglers believe they create subtle clicking sounds when jigged or bounced, mimicking the sounds of feeding baitfish or crustaceans, further attracting attention.
Tiny floats, like small foam cigar floats or plastic corks, can be strategically placed on your leader to lift your bait just slightly off the bottom. This is particularly effective in situations where the bottom is soft and muddy, preventing your bait from burying itself and becoming invisible. It can also help present your bait in a more visible column, allowing it to flutter enticingly above any submerged weeds or structure. A float can give your bait a more natural, suspended action, making it appear more vulnerable to a passing fluke.
Finally, the world of scent and artificial baits has revolutionized fluke fishing. Scented soft plastics, like Berkley Gulp! Alive!, are incredibly effective and can often outfish natural bait on their own. The scent trail they leave in the water is a powerful attractant. Many anglers will tip their main hook or teaser with a piece of Gulp! or a strip of natural bait (like squid or spearing) that has been soaked in a commercial fish attractant. This combination of visual appeal, movement, and powerful scent can be an irresistible offering to even the most reluctant fluke. You can often find great deals on Gulp! products and other fishing scents on Amazon.
Step-by-Step Guide to Tying a Basic Fluke Rig (Hi-Lo Teaser Style)
Tying your own fluke rigs isn't as daunting as it might seem, and it offers the advantage of being able to customize your setup precisely for the conditions you're fishing. Plus, there's a certain satisfaction that comes from catching fish on a rig you tied yourself! This classic hi-lo teaser style rig is a go-to for many New Jersey anglers.
Materials Needed and Initial Setup
Before you start tying, gather all your materials. You’ll need:
- Leader Material: 20-30lb fluorocarbon is ideal. Cut a length of about 3 to 4 feet to start; you can always trim it later.
- Main Hook: A 3/0 or 4/0 J-hook is a good all-around size for fluke.
- Teaser Hook: A smaller 1/0 or 2/0 J-hook, perhaps dressed with a bucktail or a small grub. (You can buy these pre-made or tie your own.)
- Sinker: A bank, pyramid, or disc sinker, typically 1 to 4 ounces depending on current.
- Swivel: A small barrel or ball-bearing swivel (size 7-10).
- Beads: A few small plastic beads (optional, but good for protection and attraction).
- Tools: Sharp scissors or line clippers, and possibly a pair of small pliers.
Find a clean, well-lit workspace where you can comfortably tie knots. Lay out all your components so they’re easily accessible. It's always a good practice to have a small container for discarded line tags to keep your area tidy and prevent waste from blowing into the water or littering your boat. Double-check that your hooks are sharp – a dull hook is a missed fish!
We're going to build this rig from the bottom up, which often makes the process easier to visualize and manage. Having the right length of leader is crucial; too short, and you'll struggle to tie the knots, too long, and it becomes unwieldy. The 3-4 foot starting length gives you ample line to work with, ensuring your loops are spaced correctly and your knots are secure. This approach allows for a robust, tangle-resistant rig that presents your bait exactly where it needs to be.
Tying the Loops and Attaching Hooks
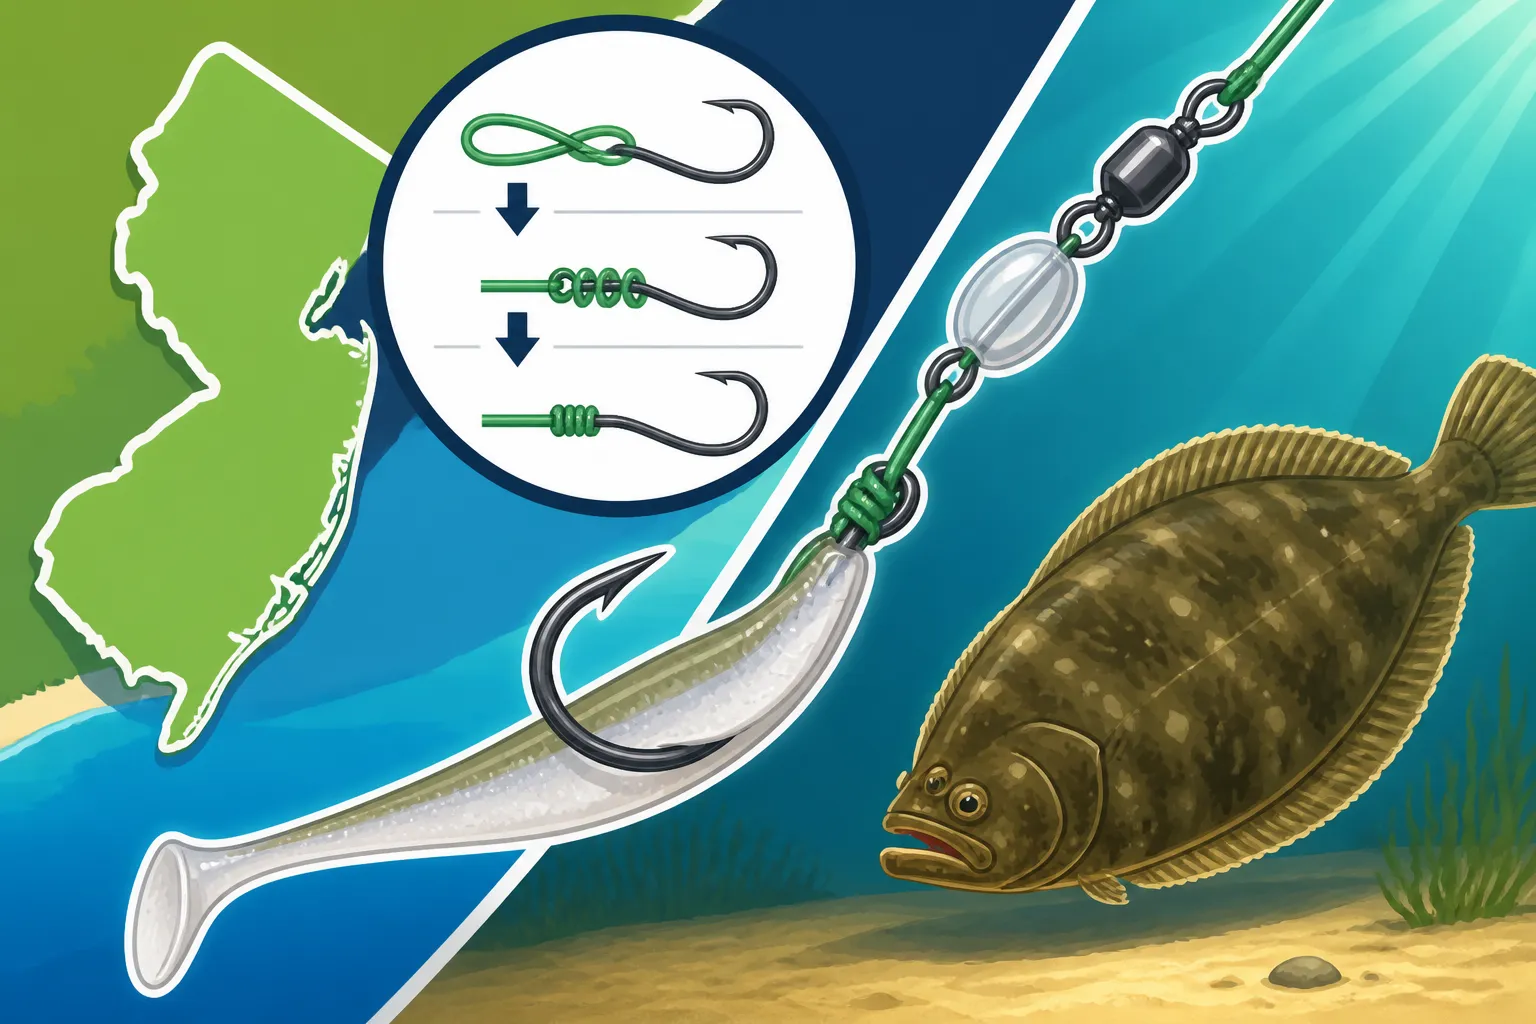
Start by making a small loop at one end of your leader – this will be where your sinker attaches. A simple surgeon's loop or a double overhand loop will work well here. This loop is at the very bottom of your leader. Now, move up your leader about 12-18 inches from that bottom loop. Here, you'll create your first dropper loop, which will hold your main fluke hook. To do this, form a loop in your line, twist it 3-4 times, then pass the tag end through the center of the twists. Pull both ends of the main line and the tag end of the loop slowly to tighten, ensuring the knot cinches down cleanly.
Now, attach your main hook to this dropper loop. The easiest way is to pass the hook's eye through the loop, then pass the hook itself through the eye of the hook, and pull tight. This creates a secure loop-to-loop connection that allows the hook to dangle freely, giving your bait a natural presentation. If your main hook is larger or you prefer a different connection, a snell knot directly to the leader can also be effective for the main bait, but the dropper loop is versatile for quick changes. For insights into general fluke fishing strategies, check out How to Fish for Fluke in New Jersey.
Next, move another 12-18 inches up your leader from your first dropper loop. Here, you'll create a second, identical dropper loop for your teaser hook. This spacing is important to prevent your hooks from tangling with each other while also ensuring both baits are in the strike zone. Attach your teaser hook in the same way you attached your main hook. You might want to slide a bead or two onto the leader above this teaser loop before attaching the hook; this can add a little more flash and help protect the knot. Many anglers find that incorporating a contrasting color teaser can make a big difference, especially when you're also using natural bait.
Adding the Sinker and Swivel
With your loops and hooks in place, it’s time to secure the terminal tackle. At the very bottom loop you tied earlier, you can either tie your sinker directly or, more commonly, attach a snap swivel. Attaching a snap swivel here allows you to quickly change sinker weights throughout the day as the current speed and depth vary. For tying to the snap swivel, an improved clinch knot or a Palomar knot are both excellent choices for strength and reliability. Make sure to pull all knots tight slowly to ensure they seat correctly and don't weaken the line.
Now, at the very top of your leader, where it will connect to your main line, tie on your barrel or ball-bearing swivel. Again, an improved clinch knot or a Palomar knot are strong, dependable options. This top swivel is absolutely essential for preventing line twist, which can be a real headache when drifting, jigging, or retrieving your rig. It acts as a buffer between your potentially spinning rig and your main line, keeping your setup clean and functional.
Once all your components are tied, give each knot a firm but controlled tug to test its strength. You'd rather a knot fail on land than when you've got a trophy fluke on the line! Inspect all your connections for any frayed lines or improper wraps. Trim any excess tag ends close to the knots. You now have a ready-to-fish fluke rig! This basic design can be customized endlessly, but it provides a strong, effective foundation for chasing fluke in New Jersey. For specific information on what baits to use, consult Best Bait for Fluke Fishing.
Here’s a quick overview of common fluke rig components:
| Component | Purpose | Typical Specifications |
|---|---|---|
| Leader Line | Abrasion resistance, stealth, natural bait presentation | 20-30 lb fluorocarbon (3-5 feet long) |
| Main Hook | Securely hold primary bait for direct strike | 3/0 – 5/0 J-hook or small circle hook |
| Teaser Hook | Secondary attraction, often with a colorful lure or small bait | 1/0 – 3/0 J-hook, dressed with bucktail, grub, or teaser |
| Sinker | Get rig to bottom, maintain contact during drift | Bank, pyramid, or disc sinkers (1-8 oz, variable by current/depth) |
| Barrel Swivel | Prevent line twist, connect leader to main line | Size 7-10 (rated 100-200 lb breaking strength) |
| Beads | Knot protection, added attraction (color, subtle sound) | Small plastic or glass beads (various colors) |
| Small Float | Elevate bait off bottom, enhance visibility, prevent burying | Small foam floats or corks (1/4" – 1/2" diameter) |
Customizing Your Fluke Rig for Specific Conditions
One of the beautiful things about fluke fishing is that it's rarely a "one-size-fits-all" scenario. The best anglers are constantly adapting their rigs, baits, and techniques to the ever-changing conditions of the water. Being able to quickly adjust your rig means more time in the strike zone and ultimately, more fish in the cooler. Understanding how to customize your rig is a key skill for any serious New Jersey fluke angler.
Adjusting for Current and Depth
The current can be your best friend or your worst enemy when fluke fishing. A nice, steady drift allows your rig to cover ground and present your bait naturally. However, too much current, especially in deeper channels or inlets, can make it nearly impossible to keep your rig on the bottom. This is where sinker weight adjustment becomes critical. If your line is pulling far behind the boat or you can't feel the bottom, you need to increase your weight. Don't be afraid to go heavier than you think you need; it's better to be slightly over-weighted than under-weighted, as maintaining bottom contact is paramount.
Conversely, in slack tide or very light currents, you might find that a heavy sinker causes your rig to drag unnaturally or dig into the bottom. In these situations, lightening your sinker allows for a more subtle and enticing drift. Sometimes, in very shallow, calm water, you might even get away with a minimal weight, letting your bait drift almost freely. The key is to find that sweet spot where your rig is moving with the current, gently bumping the bottom, but not getting swept away or sitting lifelessly. Remember that conditions can change rapidly, especially with our strong tidal swings along the Jersey Shore.
When fishing deeper areas like offshore wrecks or the channels of major inlets like the Manasquan or Shark River Inlet, you'll not only need heavier sinkers but also potentially a more robust leader. Larger fluke often inhabit these deeper zones, and the increased abrasion from structure demands a tougher leader. You might also want to slightly shorten your leader overall in very deep or strong current conditions to keep the rig more compact and manageable, ensuring your bait stays closer to the bottom as intended. Mastering these adjustments will significantly improve your success, whether you're targeting big fluke in the deep or smaller ones in the skinny water. For general regulations, make sure to review the New Jersey Saltwater Registry Explained.
Bait Presentation: Live, Cut, or Artificial?
The type of bait you choose directly influences how you present it on your fluke rig. Live bait, such as spearing, killifish, or small bunker, is often irresistible to fluke. When using live bait, it's crucial to hook it in a way that allows it to swim naturally and stay alive as long as possible. Typically, live baits are hooked through the lips or just behind the dorsal fin with a single, sharp J-hook. You want them to flutter and move, mimicking a struggling baitfish, which triggers the fluke's predatory instincts. A dedicated live bait rig might omit the teaser hook to keep the presentation simpler and focus entirely on the live offering.
Cut bait, like squid strips, clam tongues, or strips of bunker or mackerel, relies heavily on its scent trail to attract fluke. These baits can be threaded onto your main hook, often with a long, flowing tail that wiggles in the current. Combining cut bait with a teaser is a classic and highly effective strategy. For example, a strip of squid on the main hook paired with a Gulp! grub on the teaser can create an incredible one-two punch of scent and visual appeal. When threading cut bait, ensure it lies flat and doesn't spin unnaturally; a bit of practice will show you the best way to secure it for maximum flutter.
Artificial baits, especially scented soft plastics like Berkley Gulp!, have become absolute staples for fluke fishing. Many anglers fish Gulp! alone, either on a bucktail jig or a plain hook, relying on its potent scent and lifelike action. When incorporating Gulp! into your traditional fluke rig, you can tip both your main hook and your teaser with different colors or shapes. The beauty of artificials is their durability and consistency; you don't have to constantly re-bait. You can find a huge variety of Gulp! products and other soft plastics on Amazon to match local forage or experiment with new patterns. For a deeper dive into the debate, read Gulp Bait vs Live Bait for Fluke Fishing.
Enhancing Attraction with Color and Scent
Color can play a surprisingly significant role in attracting fluke, especially for your teaser and any beads you use. In murky or stained water, bright, fluorescent colors like chartreuse, hot pink, or white can stand out and grab a fluke's attention from a distance. In clearer water, more natural tones like olive green, brown, or clear might be more effective, mimicking the natural baitfish. It's always a good idea to experiment with different colors throughout the day, as fluke preferences can change with light conditions, water clarity, and even their mood. Having a variety of teaser colors in your tackle box will prepare you for any situation.
Scent is perhaps the most powerful attractant for fluke. Fluke have an excellent sense of smell, and a strong scent trail will draw them in, even if they can't immediately see your bait. Whether it's the natural oils from fresh cut bait, the powerful attractants in Gulp! products, or commercially available scent sprays and gels, adding scent to your rig dramatically increases its effectiveness. Apply scent liberally to both your natural baits and your artificials, refreshing it regularly, especially after a few drifts. This continuous trail signals "food" to nearby fluke, coaxing them to investigate your offering.
Finally, a subtle but important aspect of customization is "matching the hatch"—trying to imitate the forage that fluke are currently feeding on. If you know there's a strong presence of spearing or peanut bunker in the area, using baits or artificials that mimic their size, shape, and color can be incredibly effective. Reading local fishing reports or talking to bait shop owners can give you clues about what's currently on the menu for fluke. By combining the right rig, the right bait, and the right enhancements, you'll be well on your way to a successful day of Fluke and Summer Flounder Fishing in New Jersey.
Disclaimer
This article is for general informational purposes only and does not constitute professional advice. Laws, prices and regulations vary by location and change over time. Consult a qualified professional for guidance on your specific situation.