How to Set Up Tip-Ups for Ice Fishing
The biting cold of a New Jersey winter can make fishing seem impossible, but for those of us who still crave that tug on the line, ice fishing opens up a whole new world. However, sitting over a single hole, shivering, waiting for a bite can test anyone's patience. That's where tip-ups become an absolute game-changer, allowing you to cover more water and multiply your chances of landing that trophy fish without having to juggle multiple rods yourself. This guide will walk you through everything you need to know about setting up tip-ups for a successful and more active day on the hard water.
The Unbeatable Advantage of Using Tip-Ups for Ice Fishing
Let's be honest, ice fishing can sometimes feel like a waiting game. You drill a hole, drop a line, and just… wait. But what if you could have multiple lines in the water, spread across a wider area, all working for you at the same time? That's the magic of tip-ups. They're passive fishing devices that dramatically increase your odds and let you explore different depths and presentations without constant direct interaction.
Covering More Ice with Less Effort
Imagine trying to actively jig six different holes across a 50-yard stretch of ice. It's simply not practical, not to mention physically exhausting in the cold. Tip-ups solve this problem beautifully. Each tip-up you deploy effectively becomes a "silent sentry," patiently waiting for a bite while you focus on jigging another hole, tending a campfire, or just enjoying a hot cup of coffee. When a fish takes the bait, a flag springs up, signaling a strike from afar. This allows you to spread out your efforts, covering more of the lake or pond, and intercepting fish that might be cruising a wider path. It's especially effective in larger bodies of water like Lake Hopatcong or Round Valley Reservoir, where fish can be widely dispersed.
Think of it this way: a lone jigging rod covers a small, vertical column of water. Multiple tip-ups, strategically placed, create a "minefield" for passing fish, significantly increasing the likelihood of one of them encountering your bait. This method is particularly fruitful when targeting species that tend to roam, such as pike, walleye, or even larger trout.
Targeting Different Depths and Species
Another fantastic benefit of tip-ups is their versatility in targeting various fish species and depths simultaneously. Maybe you're after some jumbo yellow perch just off the bottom, but you also suspect a lurking pike might be patrolling higher in the water column. With tip-ups, you can set one rig for perch with a small minnow near the bottom, and another for pike with a larger shiner suspended halfway down, or even right under the ice. This kind of multi-level attack is almost impossible with active jigging alone.
For instance, when targeting walleye at night, they often cruise suspended in the mid-water column, while during the day, they might be tight to the bottom. Your tip-ups can be adjusted for these different behaviors. Similarly, if you're fishing for trout in a stocked lake, some might be holding deep, while others might be more active closer to the surface. You can learn more about how to set different rigs and depths by looking into topics like How to Ice Fish for Trout in New Jersey or How to Ice Fish for Panfish in New Jersey, which often benefit from varying presentations. This layered approach ensures that no matter where the fish are holding, you have a bait waiting for them.
Essential Components for Your Tip-Up Arsenal
Getting started with tip-ups doesn't require a massive investment, but having the right gear makes all the difference. Beyond the tip-up itself, a few key components will ensure you're ready when that flag flies.
Choosing the Right Tip-Up Style
Not all tip-ups are created equal, and understanding the different styles can help you pick the best one for your New Jersey ice fishing adventures. Each design has its advantages, often tailored to specific conditions or preferences. You can find a wide variety of these on platforms like Amazon, making it easy to compare and select.
- Traditional Cross-Stick Tip-Ups: These are probably what most people visualize when they think of a tip-up. They consist of two wooden or plastic cross-pieces that lay across the hole, with a reel suspended below and a flag mechanism above. Brands like Beaver Dam are famous for their classic, durable designs. They are generally very reliable, easy to use, and often quite sensitive. However, they can be a bit bulky to transport, and in extreme cold, slush can sometimes freeze around the cross-pieces, making them harder to remove.
- Thermal or Insulated Tip-Ups (Plate Style): These are designed with a circular plate that covers the entire ice hole, helping to prevent it from freezing over—a huge plus on those brutally cold, windy days common in New Jersey. Brands like Frabill offer excellent thermal models, often featuring an insulated cover. While they can be a little pricier, the benefit of keeping your hole open and your line free is often worth it. They are great for overnight sets or when you're fishing in truly frigid conditions, allowing you to maximize your time on the ice without constantly clearing slush.
- Rail or Windlass Tip-Ups: These designs often feature a longer "rail" or arm that extends away from the hole, providing more line capacity or a different flag mechanism. HT Enterprises has several popular options in this category. They are often more compact for transport and can be very stable on the ice. Some windlass models are specifically designed for high-wind conditions, preventing false flag trips, which can be a real frustration when the gusts are strong.
- Automatic Hook-Setting Tip-Ups: While less common for general use, some tip-ups incorporate a spring-loaded mechanism that sets the hook when a fish triggers the flag. These can be useful for very finicky biters or for targeting species that tend to drop the bait quickly. However, they can also sometimes foul-hook fish or be less sporting for some anglers.
When making your choice, consider the typical weather conditions you fish in, the species you target, and your budget. No matter what, ensure it's robust enough to handle the elements and provide clear signaling when a fish is on!
Line, Leaders, and Hooks: The Unseen Connection
The line running through your tip-up is your direct connection to the fish, so choosing wisely is crucial. Unlike jigging setups that use monofilament or fluorocarbon, tip-up lines are usually designed for durability and visibility.
- Tip-Up Line: The primary line on your tip-up's spool is typically a heavy Dacron or braided line, often in a highly visible color like black, green, or even fluorescent yellow. Dacron, a synthetic fiber, is popular for its low stretch, durability, and resistance to ice abrasion. Common breaking strengths range from 20 to 50 pounds, depending on the target species. You can find quality Dacron tip-up line on Amazon, from brands like Sufix or Berkley. The heavier test isn't necessarily for fighting fish, but rather for handling the line with cold, gloved hands and resisting nicks from the ice edge.
- Leaders: This is where you get specific. For toothy critters like northern pike or even large walleye, a steel or heavy fluorocarbon leader (30-50 lb test) is absolutely essential to prevent bite-offs. Without it, a pike's sharp teeth will cleanly sever your line. For less toothy species like trout or panfish, a fluorocarbon leader of 6-10 lb test is usually sufficient, providing invisibility in clear water and good abrasion resistance. The leader should be about 18-36 inches long, connecting your main tip-up line to your hook.
- Hooks: Hook size and style will depend entirely on your bait and target species.
- Live Minnows: A single, sharp, short-shank treble hook (size 6 or 8) is excellent for smaller minnows, hooked lightly under the dorsal fin. For larger minnows or shiners, a single O'Shaughnessy or octopus hook (size 1/0 to 4/0) can be effective, hooked through the lips or just behind the dorsal.
- Sucker Minnows (for Pike/Walleye): Larger single hooks (3/0 to 6/0) or quick-strike rigs (which use two treble hooks to increase hook-up ratios on larger fish) are ideal. Remember that in New Jersey, the use of multiple hooks or treble hooks may be restricted in some freshwater bodies, so always check the latest New Jersey Freshwater Fishing Regulations Every Angler Should Know.
- Baitfish for Catfish/Perch: A simple bait holder hook (size 4 to 1) with a worm or piece of cut bait works well.
Always ensure your hooks are razor-sharp. Dull hooks mean missed fish, especially in cold conditions where bites can be subtle.
Bait Choices for New Jersey Ice Fishing
Choosing the right bait is paramount, and for tip-ups, live bait often reigns supreme. The natural movement and scent of live bait are incredibly enticing to cold-water fish.
- Live Minnows: These are the bread and butter for many tip-up setups. Fathead minnows, shiners, or even small suckers are excellent for targeting a wide range of species, including pike, walleye, bass, and even larger crappie. You can usually find a good selection at local bait shops across New Jersey. Keeping them lively requires a good bait bucket with an aerator, especially on longer trips.
- Sucker Minnows: For trophy pike or large pickerel, larger sucker minnows (4-8 inches) are highly effective. These baits create a substantial profile and a lot of enticing movement under the ice.
- Worms/Maggots: While less common for tip-ups targeting predators, smaller pieces of nightcrawlers or spikes can be effective on tiny hooks for panfish like perch or bluegill, especially if they are suspended just above the bottom. However, for active panfish, you might find more success with a jigging rod and Best Panfish Jigs for Ice Fishing.
- Cut Bait: For catfish or even larger pike, a chunk of oily baitfish like bunker or herring (where legal and available) can be very appealing due to its strong scent trail. This is more common in states with larger populations of those species, but can be tried in New Jersey as well.
Remember, always check local regulations regarding live bait use, as some water bodies may have restrictions on what can be used to prevent the spread of invasive species.
Step-by-Step Setup: From Ice Hole to Flag Up
The process of setting up a tip-up is straightforward once you know the routine. Precision and attention to detail are key to ensuring it functions correctly when a fish decides to bite.
Drilling Your Holes and Locating Structure
Before you even think about setting up a tip-up, you need holes in the ice. This means bringing an ice auger, and ensuring you know How Thick Should Ice Be Before You Fish on It? for safety. Always prioritize safety first by checking ice thickness in multiple spots.
- Ice Augers:
- Manual Augers: Simple, reliable, and cost-effective for thinner ice (under 10 inches). Brands like Mora or StrikeMaster offer good manual options.
- Power Augers: Gas, propane, or electric augers make quick work of thicker ice, saving energy. Jiffy and Eskimo are popular brands. Electric augers, often powered by lithium batteries (like some of those available on Amazon), are becoming increasingly popular for their quiet operation and lack of fumes.
- Scouting Spots: Don't just drill randomly. Use a lake map (many available digitally or at bait shops) to identify potential structure: points, drop-offs, weed edges, humps, or submerged timber. These are all prime locations where fish will congregate. A portable fish finder can be invaluable here, allowing you to check depth and spot fish before you commit to drilling. For example, knowing the contours of a lake like Spruce Run Reservoir can give you a significant advantage.
- Hole Spacing: Space your holes out according to regulations and your strategy. New Jersey generally allows up to five lines per angler, so you'll want to spread them sufficiently to cover ground, but still be able to see and get to a flagging tip-up quickly.
Spooling and Rigging Your Tip-Up
This is the core of your tip-up setup. A properly spooled and rigged tip-up will function flawlessly when the action starts.
- Spooling the Main Line: Begin by tying your chosen Dacron or braided tip-up line to the spool of the tip-up. Wind it on neatly, ensuring there's enough line to reach the deepest parts of the water body you're fishing, plus a good reserve (usually 50-100 yards is sufficient for most New Jersey lakes and ponds). Make sure the line is evenly distributed to prevent tangles.
- Attaching the Leader: Once your main line is spooled, tie on your leader. Use a strong knot that can handle the cold and pressure, such as a double Uni knot or an Albright knot, to connect the main line to your chosen fluorocarbon or steel leader.
- Tying on the Hook: At the end of your leader, tie on your selected hook. An improved Clinch knot or Palomar knot are reliable choices. If using a quick-strike rig, ensure all hooks are securely tied and positioned correctly for your bait.
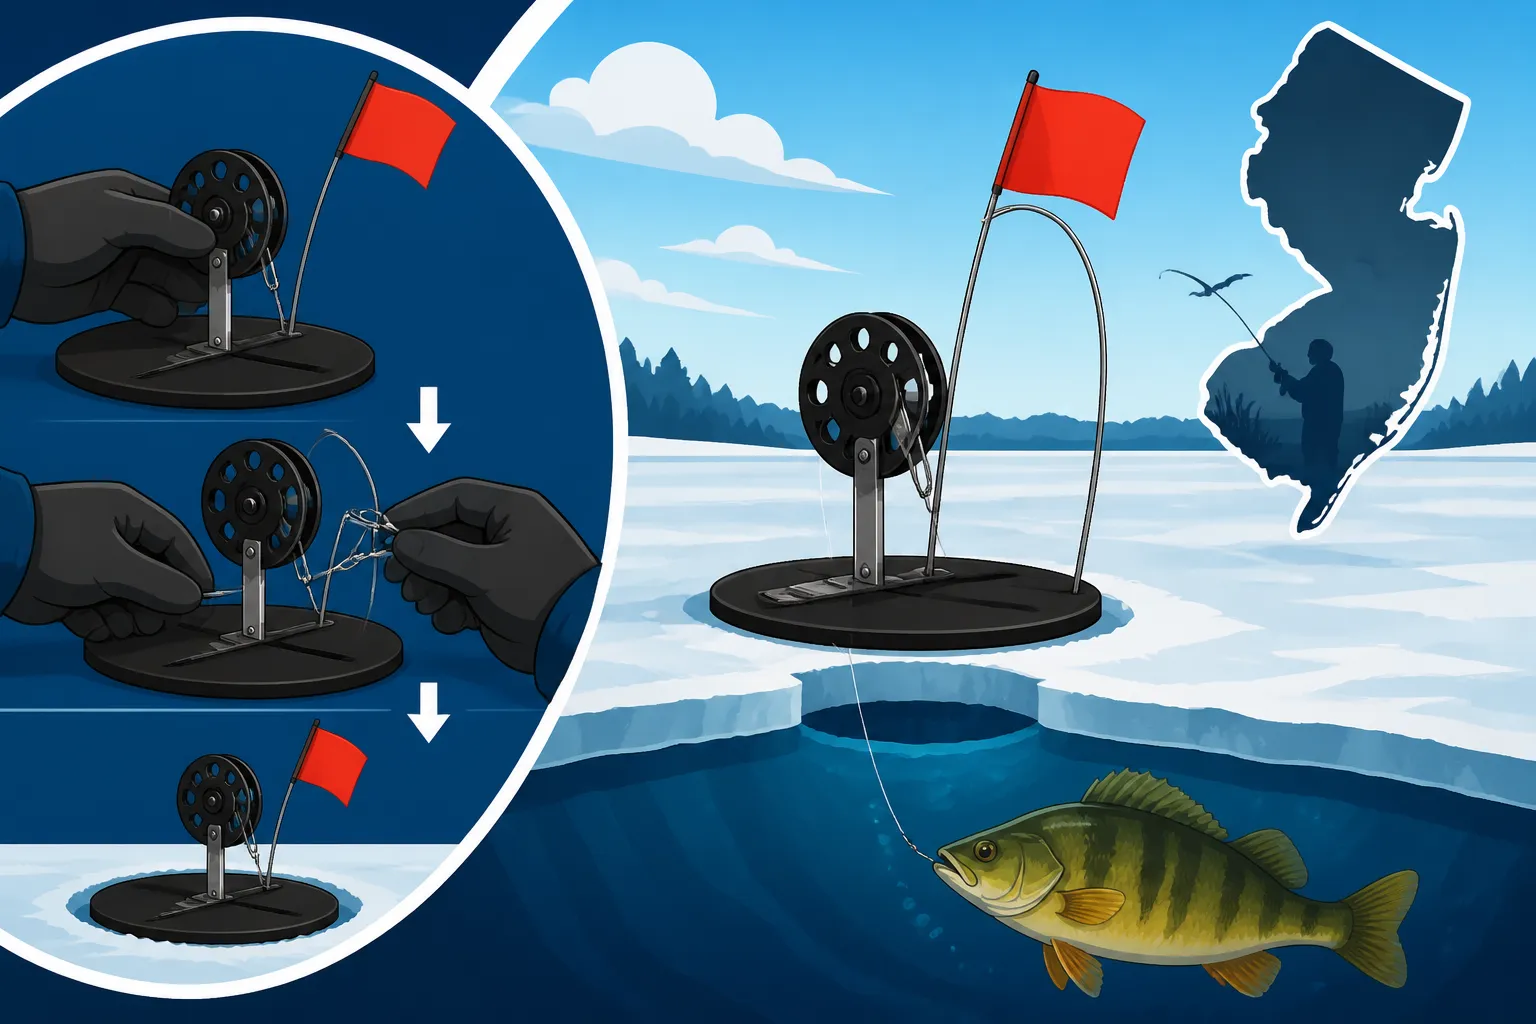
- Setting the Trigger Mechanism: Most tip-ups have a small trip mechanism that holds the flag down. The line typically runs through a small eyelet or notch and is held under a tension spring. When a fish pulls the line, it releases the spring, causing the flag to pop up. Adjust the tension:
- Light Tension: For smaller baits and finicky fish (like trout or panfish), where you want the flag to trip easily.
- Medium Tension: A good all-around setting for most live bait scenarios, offering a balance between sensitivity and preventing false flags from wind.
- Heavy Tension: For very large live baits or windy conditions, to avoid premature flag trips. Just remember, heavy tension might make it harder for smaller fish to trip the flag.
Deploying Your Bait and Setting the Depth
This is where you determine where your bait will be presented in the water column.
- Attaching Bait: Carefully hook your live minnow. For active minnows, hooking them lightly just under the dorsal fin allows for maximum swimming action. For larger minnows, hooking through both lips can be more secure if you want them suspended.
- Using a Depth Finder: Lower a small weight (a clip-on sinker or a dedicated depth finder) down your line until it hits the bottom. This tells you the exact depth of the water at your hole.
- Setting the Depth:
- Bottom Fishing: For species like perch or walleye that often feed near the bottom, set your bait 6-12 inches off the bottom. Reel up the appropriate amount of line from where your weight hit.
- Mid-Water Column: For suspended fish like pike or actively cruising trout in Trout Stocked Lakes Stay Open During New Jersey's Preseason Closure, you might set your bait anywhere from 5 to 15 feet down in 20 feet of water.
- Under the Ice: Sometimes, predatory fish will cruise right under the ice. Setting a bait just 1-3 feet below the surface can be surprisingly effective.
- Securing the Tip-Up: Place the tip-up securely over the hole. Make sure the spool is submerged enough to keep the line free from freezing, but not so deep that it interferes with the flag mechanism. Ensure the flag is properly set down and the line is running smoothly through any guides.
- Adding a Marker (Optional): Some anglers add a small split shot or bobber stopper to the main line, a few feet above the water, to act as a visual marker. When the flag goes up and the fish runs, you'll see this marker disappear down the hole, indicating how much line has been taken, and helping you gauge when to set the hook.
Maximizing Your Chances and Staying Safe on the Ice
Setting up your tip-ups is only half the battle. Knowing how to manage them, respond to bites, and prioritize safety will elevate your ice fishing experience.
Spacing Your Tip-Ups and Monitoring
Once your tip-ups are in place, don't just leave them to their own devices. Strategic spacing and diligent monitoring are crucial.
- Legal Limits: Always be aware of the maximum number of lines allowed per angler in New Jersey. Currently, it's typically five lines per person for ice fishing, but this can vary by water body and specific species, so check the New Jersey Fishing License Guide for 2026 and its accompanying digest. Violating these rules can lead to significant penalties, so it's not something to take lightly.
- Optimal Spacing: Spread your tip-ups to cover different zones. If you're targeting a weed bed, place them along the edge and maybe one or two holes slightly into the weeds. If there's a drop-off, set some shallow and some deep. Try to maintain enough distance so that you can quickly reach any flagging tip-up, but also cover a good breadth of water. If you're fishing with friends, you can coordinate your spreads to cover even more territory, making sure each person is responsible for their own legal limit of lines.
- Constant Vigilance: Even though tip-ups are passive, they demand attention. Keep an eye on your flags! Strong winds can sometimes trigger false flags, and it's easy to miss a genuine bite if you're distracted. When a flag goes up, don't rush immediately; give the fish a moment to really take the bait. A good rule of thumb is to count to five or ten (depending on the species and how aggressive the bite seems) before approaching, allowing the fish to fully commit.
Handling the Catch and Re-setting
The moment of truth! When that flag pops up, it's an adrenaline rush. Knowing how to react calmly and efficiently will help you land more fish and quickly get back in the game.
- The Flag is Up! As you approach, observe the line. Is it still running out? Is the spool spinning? If so, the fish is actively taking line. If the line is slack, the fish might have dropped the bait or is swimming towards you.
- The Hookset (Gentle but Firm): If the line is still running, gently pick up the tip-up, take a firm grip on the line, and wait until you feel definite weight or resistance. Then, give a firm, sweeping pull upwards to set the hook. Remember, with tip-ups, you're hand-lining the fish, so there's no rod to absorb shock. A too-aggressive hookset can snap light leaders.
- Fighting the Fish: This is a pure tug-of-war. Use your hands to pull in line, hand-over-hand, coiling it neatly beside the hole. Be ready for sudden runs and use the stretch of your arms to absorb headshakes. For larger fish like pike, keep your hands clear of the line to avoid burns if it makes a strong run. It's often helpful to wear warm, but not overly bulky, gloves or mittens that allow you to feel the line. You can find excellent options for What to Wear Ice Fishing on retailers like Amazon, offering warmth without sacrificing dexterity.
- Landing the Fish: Once the fish's head is in the hole, quickly but carefully hoist it onto the ice. If it's a large, toothy fish like a pike, use a gaff or a large pair of jaw grabbers to secure it. Avoid grabbing a pike by the gills directly, as their gill plates are incredibly sharp.
- Re-baiting and Re-setting: After landing your fish, quickly unhook it, decide whether to keep it or release it, and get your tip-up re-baited and back in the water. The sooner your line is back in the water, the sooner you can catch another fish. If the spot was productive, reset it in the same place. If not, consider moving it slightly or adjusting the depth.
Ice Fishing Safety Considerations
While exciting, ice fishing comes with inherent risks. Safety should always be your number one priority, especially when spreading out on the ice with multiple tip-ups.
- Ice Thickness: Never assume the ice is safe. Always check ice thickness with an auger or spud bar as you venture out. A minimum of 4 inches of clear, solid ice is generally recommended for walking, and more for groups or equipment. Consult resources like New Jersey Ice Fishing Safety Basics or How Thick Should Ice Be Before You Fish on It? for detailed guidelines.
- Buddy System: Always fish with a partner. If something goes wrong, a buddy can call for help or assist you.
- Safety Gear: Carry essential safety gear: ice picks (worn around your neck for quick access), a throw rope, and a fully charged cell phone. Dress in layers, including waterproof outer layers, and wear appropriate winter boots. Check out What to Wear Ice Fishing for comprehensive advice.
- Know Your Limits: Be aware of your physical limits in the cold. Hypothermia can set in quickly. Take breaks, stay hydrated, and have warm drinks and snacks.
- Local Regulations: Reiterate the importance of knowing and following all New Jersey Department of Environmental Protection (NJDEP) Fish and Wildlife regulations, including specific limits on lines, species, and bait. Your New Jersey Fishing License Guide for 2026 and accompanying digest are your best friend here.
By following these guidelines, you'll be well on your way to enjoying the thrill of tip-up ice fishing in New Jersey, reeling in some fantastic catches while staying warm and safe.
| Tip-Up Style | Key Features | Pros | Cons | Best Use Case |
|---|---|---|---|---|
| Traditional (e.g., Beaver Dam) | Two cross-pieces, standard spool, spring-flag. | Durable, reliable, sensitive, easy to use. | Can be bulky, hole can freeze over in extreme cold. | General ice fishing, targeting various species in moderate conditions. |
| Thermal (e.g., Frabill Pro Thermal) | Insulated cover, circular base over hole, internal spool. | Prevents hole from freezing, protects line from wind, compact. | Higher cost, can accumulate slush on top if not cleared. | Extreme cold, overnight sets, windy conditions, finicky bites. |
| Windlass/Rail (e.g., HT Enterprises Windlass) | Long arm extending from hole, larger spool capacity, often adjustable tension. | Stable in wind, good for large fish/deep water, compact for transport. | Some designs might be less sensitive to light bites. | Large lakes, targeting big predators like pike or walleye, windy days. |
Disclaimer
Fishing regulations, safety guidelines, and ice conditions can change rapidly. Always check the most current New Jersey Fish and Wildlife regulations before heading out on the ice. Exercise extreme caution and prioritize safety at all times. The information provided here is for general guidance only and should not replace official sources or professional advice.