How to Tie a Bucktail for Striped Bass
If you've ever stood on a chilly New Jersey beach or a rocky inlet, casting for striped bass, you know there's a certain magic to a bucktail jig. But let's be honest, sometimes those store-bought bucktails just don't feel quite right, or they get chewed up after a few good fish. The frustration of losing a favorite lure, or wishing you had one with just the right amount of flash or the perfect color combination for the day's conditions, is real. This comprehensive guide is going to walk you through everything you need to know about tying your very own bucktail jigs for striped bass, giving you the ultimate control over your presentation and a deep satisfaction that comes with catching fish on something you crafted yourself.
Understanding the Magic of the Bucktail Jig for Striped Bass
There's a reason the bucktail jig has remained a staple in surf bags and boat tackle boxes across the Jersey Shore for generations. It’s incredibly versatile, effective, and often outperforms more complex lures when the stripers are on the feed. But what makes this deceptively simple lure so special?
Why Bucktails Are So Effective
At its core, a bucktail jig is designed to imitate baitfish. Whether it's a fleeing sand eel, a struggling spearing, or even a small squid, the natural movement of deer hair in the water creates a lifelike "breathing" action that predatory striped bass find irresistible. Unlike hard baits with fixed profiles, the hair on a bucktail pulsates and contracts, appearing larger or smaller depending on the retrieve speed and current. This dynamic profile is key.
When you jig it along the bottom, it mimics a baitfish rooting around or trying to escape. When retrieved steadily, it looks like a natural swimmer. The jig's weight allows for long casts, crucial for reaching rips and deeper channels from the beach, and it helps it cut through strong currents that might blow lighter lures off course. Plus, it’s remarkably weedless compared to treble-hooked plugs when fished correctly, making it ideal for navigating rocky bottoms or areas with submerged grass. The effectiveness isn't just anecdotal; countless trophy stripers have fallen to a well-presented bucktail.
Anatomy of a Bucktail Jig
Before we dive into tying, let's quickly break down the parts of a bucktail jig. Understanding each component helps you appreciate its role and choose the right materials for your custom creations.
- Jig Head: This is the heart of your bucktail. It's typically made of lead and comes in various shapes (round, bullet, flat-head, banana) and weights. The weight determines casting distance and sink rate, while the shape influences its action in the water. A good jig head has a sturdy, sharp hook that can handle the power of a big striper.
- Bucktail Hair: This is the "bucktail" itself, usually sourced from a deer's tail. The stiff, hollow hairs flare and undulate in the water, giving the jig its characteristic profile and action. Different sections of the deer tail offer varying lengths and stiffness, allowing for different aesthetics and actions. Some anglers also incorporate synthetic hairs for added durability or flash.
- Tie-In Point: This is the area just behind the jig head where the hair is secured with thread. A strong, neat tie-in is essential for a durable jig.
- Trailer (Optional but Recommended): While not part of the core bucktail, adding a soft plastic or pork rind trailer is almost universally accepted as a way to enhance the jig's action and appeal. It adds length, color, and additional movement, making your bucktail even more enticing.
Knowing these components will help you visualize the tying process and understand how each piece contributes to the final, fish-catching product.
Essential Materials You'll Need to Tie Your Own Bucktail
Getting started with bucktail tying requires a few specific materials and tools. Don't worry, it's not an overwhelming list, and many items can be found readily. The quality of your materials can significantly impact the durability and effectiveness of your finished jigs.
The Right Bucktail Hair
This is, predictably, the most important ingredient. You're looking for natural deer hair, specifically from the tail. You'll find bucktails sold by color, and sometimes by the "prime" nature of the hair.
- Natural Deer Tail: Look for bucktails that have good length and aren't too sparse. The hair from the top and sides of the tail is generally coarser and longer, ideal for the main body of the bucktail, while hair from the tip can be finer. White is a staple, but black, yellow, and various shades of green, blue, and chartreuse are also popular. You can often find a good selection of quality bucktail hair on online retailers like Amazon or at your local tackle shop.
- Synthetic Options: Some anglers mix in or use entirely synthetic hair, such as craft fur or various Mylar blends. These materials offer different actions, colors, and levels of flash. While traditionalists might scoff, synthetics can be incredibly durable and add a tantalizing sparkle that natural hair sometimes lacks. Experimentation is key!
When selecting hair, consider the length needed for your jig head size. A 1-ounce jig might need hair 3-4 inches long, while a 3-ounce jig could use hair up to 6 inches for a good profile.
Choosing Your Jig Heads and Thread
These two components are critical for both structure and performance.
- Jig Heads: You'll want sturdy lead jig heads with strong, corrosion-resistant hooks. The weight you choose will depend on where and how you plan to fish. For surf fishing in strong currents or deeper channels, you might opt for 2 to 4-ounce heads. For calmer back bays or shallow inlets, 3/4 to 1 1/2-ounce heads might be more appropriate. Common shapes include bullet heads for a fast sink and streamlined retrieve, or flat-head jigs that offer a bit more flutter. Many excellent jig head options are available from various manufacturers, often sold in bulk packs which can be very economical.
- Tying Thread: You need strong, waxed nylon or Kevlar thread. Fishing-specific tying threads are ideal as they are designed for durability and grip. Denier ratings indicate thread thickness; a 210 denier nylon thread is a good all-around choice for bucktails. The wax helps the thread grip the hair and prevent slippage, ensuring a tight, lasting wrap. Color isn't crucial as it will be covered by cement, but black or white are common.
Other Handy Tools
While not strictly necessary for basic tying, these tools make the process much easier and yield a cleaner, more professional-looking jig.
- Tying Vise: This holds your jig head securely in place, freeing up both hands for tying. A basic vise is inexpensive and a worthwhile investment. You can find starter kits that include a vise, bobbin, and other tools on Amazon.
- Bobbin: Holds your tying thread, allowing you to maintain constant tension and smoothly apply wraps.
- Scissors: Sharp, fine-tipped scissors are essential for precise cuts of hair and thread. Keep a separate pair for tying; don't use your household scissors.
- Head Cement or Super Glue: After tying, a few drops of head cement or super glue (cyanoacrylate) will seal your thread wraps, making the jig much more durable and preventing the hair from pulling out.
- Zap-A-Gap or UV Resin (Optional): These offer quick-drying, super strong bonds. UV resin, cured with a small UV light, is fantastic for a rock-hard, clear finish.
Having these tools ready will streamline your tying process and help you create high-quality bucktails.
Step-by-Step Guide to Tying a Classic Bucktail Jig
Now for the fun part! Tying a bucktail is a skill that improves with practice, but the basic steps are straightforward. We'll focus on a classic, effective method that yields durable jigs.
Preparing Your Jig Head
Before you even touch the hair, a little preparation goes a long way in ensuring a clean and lasting tie.
- Secure the Jig: Clamp your chosen jig head firmly in your tying vise. Make sure the hook is pointing downward or to the side, allowing clear access to the shank where you'll be tying the hair. Wiggle it to ensure it won't budge.
- Clean the Hook Eye: Sometimes, excess paint or lead can partially block the hook eye. Use a bodkin or a small, pointed tool (even a straightened paperclip) to clear any obstructions. This ensures your line or leader can pass through easily when you're rigging it up to fish.
- Lay a Thread Base: Attach your tying thread to the hook shank just behind the jig head. Wrap the thread tightly in a smooth, even layer from the lead collar back towards the bend of the hook, covering about 1/2 to 3/4 of an inch. Then, wrap back towards the lead collar, creating a solid, slightly sticky foundation for the hair. This "thread base" prevents the hair from spinning around the hook shank under pressure.
Attaching the Tail Hair
This is where the bucktail gets its iconic shape and action. You'll work in sections, building up the profile.
- Select and Prepare the First Section of Hair: Choose a small clump of bucktail hair, usually 1/4 to 1/2 inch wide, from the main part of the deer tail. The length should extend about 1.5 to 2 times the length of the jig head. Hold it firmly and strip out any loose, short hairs from the cut end. You want the ends that will be tied in to be clean and relatively even.
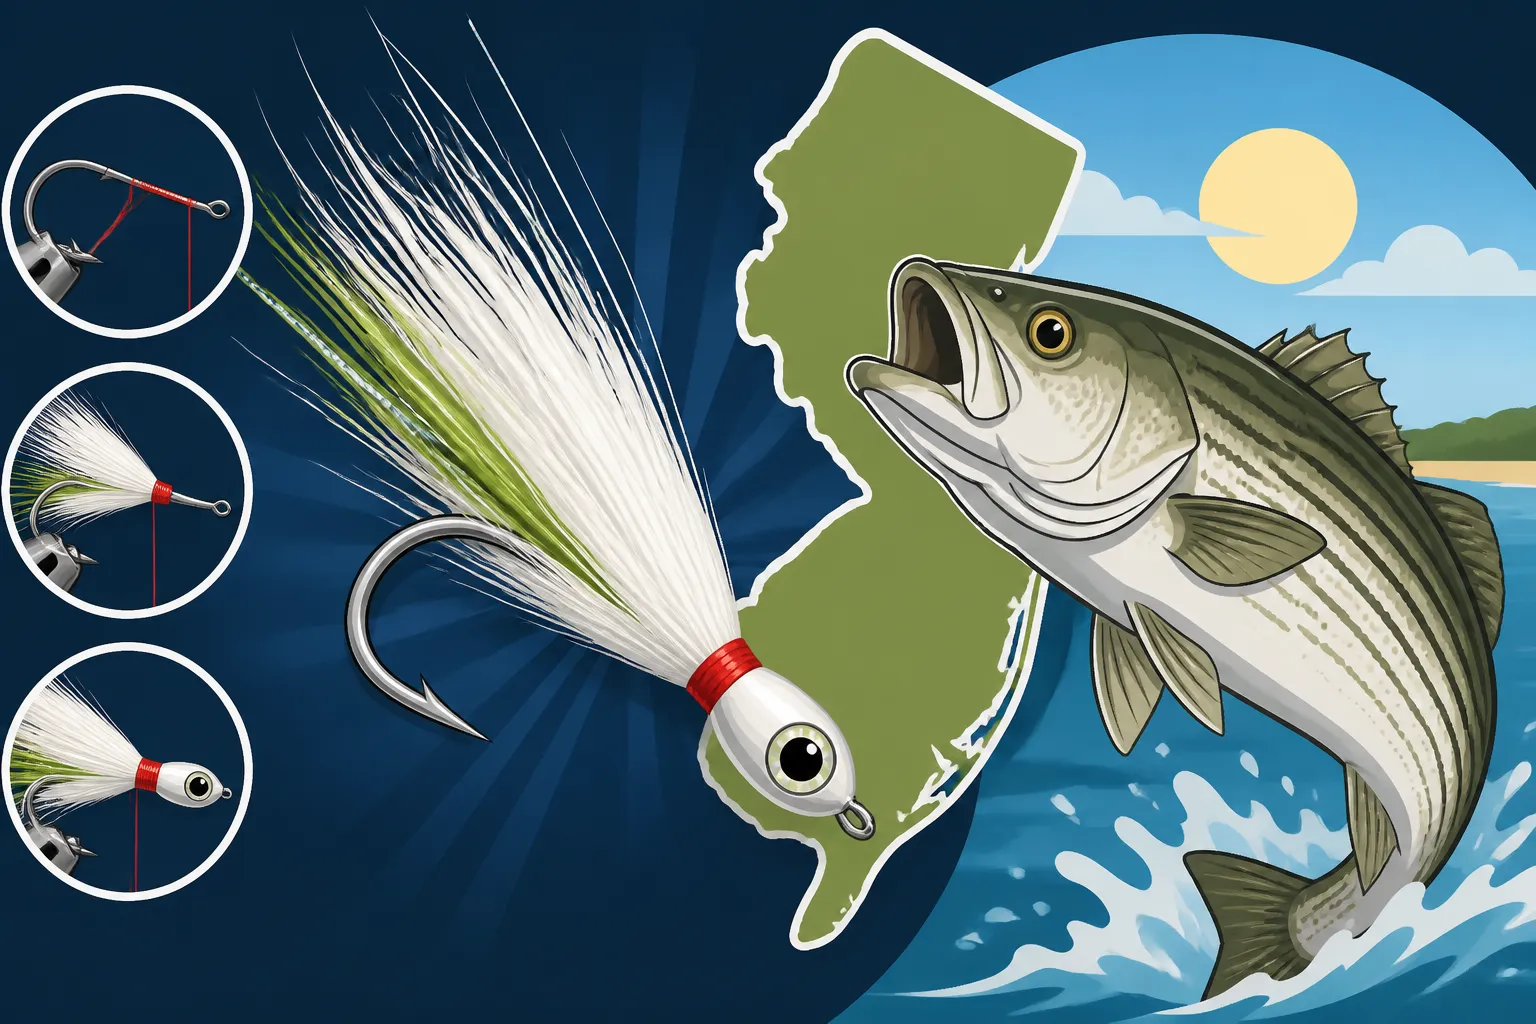
- Tie in the Underside Hair: Place the prepared hair clump along the bottom of the hook shank, with the tips extending past the hook bend. Make one loose wrap with your thread to secure it, then gradually tighten it while ensuring the hair stays centered and doesn't twist. Make several tight, firm wraps to bind the hair securely to the hook shank. Trim the butt ends of the hair at an angle, tapering them towards the lead collar. This helps create a smooth transition.
- Tie in the Topside Hair: Repeat the process for the top of the hook shank. Select another clump of hair, measure its length (again, 1.5 to 2 times the jig head length), and strip out loose fibers. Place it on top of the shank, ensuring the tips align with the underside hair. Secure it with tight wraps, gradually increasing tension, and then trim the butt ends at an angle. The goal is to have an even distribution of hair that creates a balanced profile.
- Adding Side Hair (Optional but Recommended): For a fuller profile, you can add smaller clumps of hair to the sides of the hook shank. This helps fill out the jig and prevent it from appearing too flat. Follow the same tying method, ensuring even distribution.
Remember, consistent tension is key to a durable bucktail. You don't want the hair to pull out after a few fish or snags.
Building the Body and Finishing Touches
With the tail hair secured, it's time to build out the body and finish your jig.
- Layering for Fullness: Some anglers like to add a second, shorter layer of hair, often a different color, just behind the lead collar to create a fuller, more tapered body. This also helps push the main tail hairs outward, enhancing their "breathing" action. If doing so, select shorter clumps, typically 1 to 1.5 times the length of the jig head, and tie them in around the entire shank, just behind the lead collar.
- Whip Finish: Once all your hair is tied in and you're satisfied with the profile, it’s time to secure the thread. A "whip finish" is a specialized knot that creates a series of interlocking loops, forming a very strong and neat finish. If you don't have a whip finishing tool, you can do a series of half-hitch knots, pulling each one tight. Make 4-5 secure wraps to finish off your tying thread.
- Apply Head Cement: This is the final, crucial step for durability. Liberally apply head cement or super glue to the thread wraps, ensuring it saturates the thread and the butt ends of the hair. This creates a hard, protective shell that locks everything in place. Allow it to dry completely. Some anglers apply a second coat for extra protection.
- Trim and Shape: Once dry, inspect your bucktail. You might need to trim a few errant hairs to achieve a neat, fish-attracting profile. Use your sharp scissors for precise cuts, avoiding trimming too much of the main tail.
With practice, you'll develop a feel for how much hair to use and how to apply tension, leading to beautifully crafted bucktails ready to catch some serious striped bass.
Advanced Tips and Customizations for New Jersey Anglers
Once you've mastered the basic bucktail, there's a whole world of customization and advanced techniques to explore. New Jersey's diverse waters and changing conditions often demand a little extra finesse or flair from your lures.
Adding Flash and Trailer Hooks
These small additions can make a huge difference in attracting finicky stripers.
- Flash Materials: Mylar flash, Krystal Flash, or even thin strips of reflective material can be tied in with your bucktail hair to add a shimmering, irresistible sparkle. Striped bass often key in on the flash of baitfish scales, and a touch of silver, gold, or iridescent flash can mimic this perfectly. Tie it in sparingly at first; too much can make the jig look unnatural. A few strands incorporated with the main body hair, or as a distinct "lateral line" on the sides, can be very effective, especially in clearer water or on bright days. You can find various colors of flash materials on Amazon, offering endless customization options.
- Trailer Hooks: For those short-striking fish that nip at the tail, a trailer hook can be a game-changer. These are typically smaller, single hooks attached to the main hook via a small piece of monofilament, fluorocarbon, or wire leader. The trailer hook dangles freely just behind the main hook, increasing your hook-up ratio. Ensure the trailer hook is strong enough to handle a striper and that it doesn't foul or interfere with the jig's action. They are especially useful when fishing with longer soft plastic or pork rind trailers, which can extend well past the main hook point.
- Soft Plastic or Pork Rind Trailers: While not tied into the bucktail, these are essential additions. Curly-tail grubs, paddle-tail shads, or classic Uncle Josh pork rinds add extra action, bulk, and scent. The undulating tail of a soft plastic or the natural movement of a pork rind can mimic a struggling baitfish even better than bucktail hair alone. Matching the color of your trailer to your bucktail, or using a contrasting color, can elicit different responses from the fish. For instance, a white bucktail with a chartreuse curly tail is a classic combination.
Color Combinations for Different Conditions
The right color bucktail can make or break a fishing trip. Consider these common scenarios:
- White: The undisputed champion. White bucktails are incredibly versatile and effective in almost all conditions, mimicking a wide variety of baitfish. If in doubt, start with white.
- Chartreuse/Yellow: Excellent in stained or murky water, or on overcast days. The bright, high-visibility colors stand out, helping stripers locate your lure. This is also a go-to color for imitating bunker or herring.
- Green/Olive: Mimics spearing, peanut bunker, or other small baitfish. Great for clear water and sunny conditions when a more natural presentation is needed. Olive over white is a popular blend.
- Black/Dark Colors: Surprisingly effective, especially at night or in very low light conditions. Dark silhouettes are often easier for fish to see against a dim sky or light bottom. Try black bucktails with a dark purple or black trailer when fishing after dark.
- Pink/Orange: Can be surprisingly effective during certain baitfish runs (like squid) or when fish are being particularly aggressive. These colors can trigger a predatory response.
Knowing the local baitfish and water clarity will guide your color choices. Always have a few different options on hand.
Common Mistakes to Avoid
Even experienced tyers can fall into these traps. Being aware can save you frustration.
- Too Much Hair: This is probably the most common mistake. Overdressing a bucktail makes it stiff and inhibits its natural "breathing" action in the water. It also adds bulk, making it harder to cast and sink effectively. Less is often more with bucktail; you want a sparse, lifelike movement, not a dense brush. Aim for enough hair to give it profile, but still allow water to flow through easily.
- Loose Wraps: If your thread wraps aren't tight and secure, your bucktail hair will eventually pull out or spin around the hook shank. Use consistent, firm tension.
- Skipping the Cement: Don't skip this step! Without head cement, your thread wraps will unravel over time, especially after catching a few toothy bluefish or a strong striper.
- Unbalanced Hair: If you tie in too much hair on one side, your bucktail might spin or swim erratically. Distribute the hair evenly around the hook shank for a balanced presentation.
- Ignoring the Hook Eye: As mentioned, a blocked hook eye is a nuisance. Always check and clear it before applying cement.
By avoiding these pitfalls, your hand-tied bucktails will be more durable, effective, and a true joy to fish.
Fishing Your Hand-Tied Bucktail in New Jersey
Tying a great bucktail is only half the battle; knowing how to fish it effectively is where the real magic happens. For New Jersey anglers, the bucktail is an indispensable tool for chasing striped bass in a variety of environments.
Retrieval Techniques for Striped Bass
The beauty of the bucktail is its versatility. You can adapt your retrieve based on conditions, bait presence, and the mood of the fish.
- The Classic Jig: This is the bread and butter. Cast your bucktail out and let it sink to the bottom (or just above where you expect the fish to be). Then, use a series of sharp, short lifts of your rod tip (1-3 feet) followed by allowing the jig to fall back to the bottom on a semi-slack line. The strike often occurs on the fall. Reel up the slack as the jig drops, maintaining just enough tension to feel a bite. This retrieve mimics a bottom-feeding or wounded baitfish. This technique is particularly effective when you're How to Jig for Striped Bass in deeper channels or around structure.
- The Sweep and Pause: Similar to jigging, but with longer, slower sweeps of the rod. Sweep your rod tip from 9 o'clock to 12 o'clock, then drop it back down, reeling in the slack. This creates a longer, more exaggerated hop that can entice less aggressive fish.
- The Steady Retrieve: Sometimes, stripers are chasing bait near the surface or suspended in the water column. A slow to moderate steady retrieve can be incredibly effective, making your bucktail look like a cruising baitfish. Vary your retrieve speed until you find what the fish prefer. This is especially good when using a paddle-tail or curly-tail trailer that has its own action.
- Working the Current: In places like the Manasquan Inlet or Raritan Bay, understanding how to use the current is paramount. Cast your bucktail slightly upcurrent and let it drift naturally with the flow, maintaining contact. The current will make the bucktail hair pulsate, giving it a hyper-realistic action. Occasionally lift your rod tip or give a short twitch to simulate a struggling baitfish. The natural drift can often trigger strikes from stripers holding in eddies or behind structure.
Remember, always try to feel the bottom. If you're not occasionally bumping bottom, you might be retrieving too fast or not using a heavy enough jig for the current and depth.
Where and When to Fish Bucktails for Stripers
New Jersey offers endless opportunities for bucktailing striped bass. Your hand-tied creations will excel in many situations.
- Inlets and Estuaries: Areas like Barnegat Inlet, Shark River Inlet, or the Manasquan Inlet are prime bucktail territory. The strong currents, rocky structures, and presence of abundant baitfish make them ideal for jigging. Cast parallel to jetties, into rips, or along current seams. Stripers will often hold in these turbulent areas, waiting to ambush unsuspecting bait.
- Surf Fishing: From Sandy Hook down to Cape May, the beaches of New Jersey provide excellent surf fishing. Bucktails are fantastic for casting long distances to reach outer sandbars and sloughs where stripers often feed. During the spring and fall runs, When Do Striped Bass Migrate Through New Jersey?, bucktails imitating sand eels or bunker can be deadly. Learn New Jersey Surf Fishing Techniques to get the most out of your casts.
- Boat Fishing: Whether you're drift fishing in the bays or jigging over wrecks and reefs offshore, bucktails are incredibly effective from a boat. They allow you to precisely target structure and get your lure down to feeding fish quickly. Many anglers will drift over mussel beds or rocky humps, bouncing bucktails along the bottom.
- Tidal Rivers: Rivers like the Mullica or Toms River, which experience tidal influences, can hold stripers, especially in the spring and fall. Bucktails are great for working river bends, deeper holes, and around bridge pilings.
- Timing: While bucktails can catch stripers year-round, they are particularly effective during the spring and fall migrations. Early morning and late evening often yield the best results, as stripers are more actively feeding in lower light conditions. Incoming and outgoing tides are also crucial, as moving water concentrates bait and makes stripers more active. Understanding Best Time of Year to Fish for Striped Bass in New Jersey will help you plan your trips.
By understanding these techniques and locations, your custom-tied bucktails will become incredibly effective tools in your New Jersey striper arsenal.
Here's a quick guide to help you select bucktail colors based on common fishing conditions:
| Condition | Recommended Bucktail Color(s) | Trailer Color Suggestion | Why It Works |
|---|---|---|---|
| Clear Water / Sunny Day | White, Green, Olive | Clear, Pearl, Green | Natural imitation of baitfish, less obtrusive. |
| Murky Water / Overcast | Chartreuse, Yellow, White | Chartreuse, Orange, White | High visibility, stands out in poor light conditions. |
| Night Fishing / Low Light | Black, Dark Purple, Dark Blue | Black, Dark Red, Dark Blue | Strong silhouette against the dim background. |
| ** imitating Sand Eels** | White, Pink, Green, Tan | Clear, Pink, White | Matches common baitfish profile and color in surf zones. |
| ** imitating Bunker** | White, Yellow, Chartreuse | White, Yellow, Black | Imitates larger, fuller-bodied baitfish. |
| Aggressive Fish / Blitz | White, Bright Pink, Chartreuse | Bright Orange, Red | Triggers a strong predatory response, highly visible in a feeding frenzy. |
Experiment with these combinations, and don't be afraid to try something unexpected! Sometimes, a unique color can be just the ticket.
Disclaimer
This article is for general informational purposes only and does not constitute professional advice. Laws, prices and regulations vary by location and change over time. Consult a qualified professional for guidance on your specific situation.